How to Host a Days of War Server – Step-by-Step Guide for Infantry Units
If you’re ready to command your own frontline, hosting a Days of War server is the perfect way to take full control of the battlefield. Set your match rules, run your own map rotation, and bring your community together for fast-paced WWII combat exactly the way you want it.
This guide explains how to host your own Days of War server and why Citadel Servers is an excellent partner for your setup.
Step 1: Choose a Reliable Hosting Provider
Days of War is a competitive WWII shooter that requires low latency and consistent performance—especially during large firefights and coordinated team play.
Performance: Strong CPU power and fast NVMe SSD storage help maintain smooth hit registration, stable tick rates, and responsive gameplay.
Network Quality: Low-latency networking ensures accurate player movement and reliable syncing across all active players.
Ease of Management: A user-friendly control panel makes adjusting server configs, map cycles, rules, and mods straightforward.
Support Availability: 24/7 support ensures you’re never stuck waiting when you need technical help fast.
Citadel Servers provides all of this—delivering excellent reliability and the performance required for high-intensity Days of War matches.
Step 2: Order Your Hosting Plan
Setting up your Days of War server is fast and easy:
1. Go to the Day of War hosting page.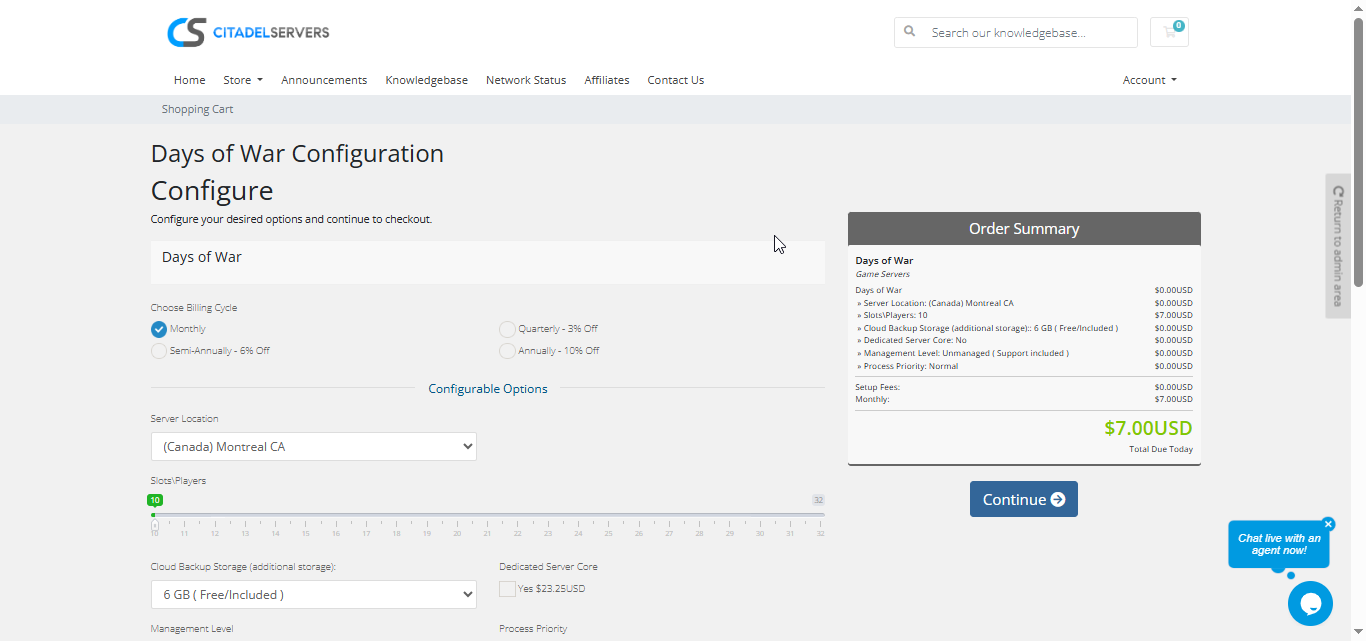
2. Choose how many player slots you want.
3. Pick your server location closest to your player base for the best ping.
4. Select any extras, like process priority, premium support, etc.
5. Proceed to checkout — once payment is confirmed, your server deploys automatically.
You’ll receive an email with your control panel login details and connection info within minutes.
Step 3: Configure Your Server
After deployment, it’s time to personalize your server:
- Follow our Quick Start Guide
Set your server name, password, and admin access.
Configure map rotation, game modes, spawn timers, and friendly-fire rules.
Adjust performance settings for competitive or casual playstyles.
Upload custom maps, configs, or plugins via FTP/SFTP if needed.
All setup and configuration is done through the Citadel Control Panel, designed to be intuitive for both new and experienced server owners.
Step 4: Launch and Play
When your configuration is complete, start your server with one click and invite your community.
Players can join via the in-game server browser or by entering your server’s IP and port.
All settings can be configured directly from the Citadel Control Panel, designed to be easy for both new and experienced server operators.
Why Host with Citadel Servers
When you host a Days of War server with Citadel Servers, you get the performance, stability, and flexibility needed to support fast-paced firefights and active communities. Our hosting ensures smooth gameplay and full control over customization.
What Makes Us Stand Out
High-Performance Hardware: Dedicated CPU resources and fast NVMe SSDs keep matches smooth and responsive, even during heavy action.
Global Data Centers: Choose from multiple worldwide locations to ensure low ping for all players.
Full Access & Config Control: Upload, edit, and customize any server file, including maps, plugins, and config settings.
One-Click Tools & Easy Management: Adjust settings and manage your server without needing complicated external tools.
Automated Backups & Easy Restarts: Protect your data and manage reboots directly from your control panel.
24/7 Expert Support: Our technical team is always available to help with setup, troubleshooting, optimization, or configuration.
Your frontline deserves a powerful and reliable foundation — and Citadel Servers provides the performance and flexibility that Days of War communities need.
Order Your Days of War Server Now

